Stephen Curry Shooting Form: 10-Step Breakdown (With Drills)
Last Update On: May 12, 2026
Stephen Curry is widely regarded as the greatest shooter in NBA history. His ability to drain three-pointers from 30+ feet, off the dribble, through tight coverage, and with defenders flying at him has permanently changed how basketball is played and how players are developed.
But what actually makes his shot so effective? Is it pure talent, or is there a mechanical blueprint behind it?
The answer is both. Curry has put in an almost inhuman amount of practice to perfect a shooting form that is partly unorthodox and entirely elite. In this article, we break down his shot into 10 clear, actionable steps so you can understand every phase of his mechanics, learn what you should borrow for your own game, and discover which drills will help you build similar habits.
Quick Note on Copying Stephen Curry Shooting Form: Every player has a different body type, hand size, wingspan, and strength level. The goal here is not to clone Curry’s shot motion-for-motion. It is to understand why each element works, so you can apply the right principles to your own physical makeup.
The Setup Phase
Good preparation before the ball arrives determines whether a shot is made or missed before it even leaves the hands. Curry is a master of preparation, and his setup is one of the most underrated parts of his game.
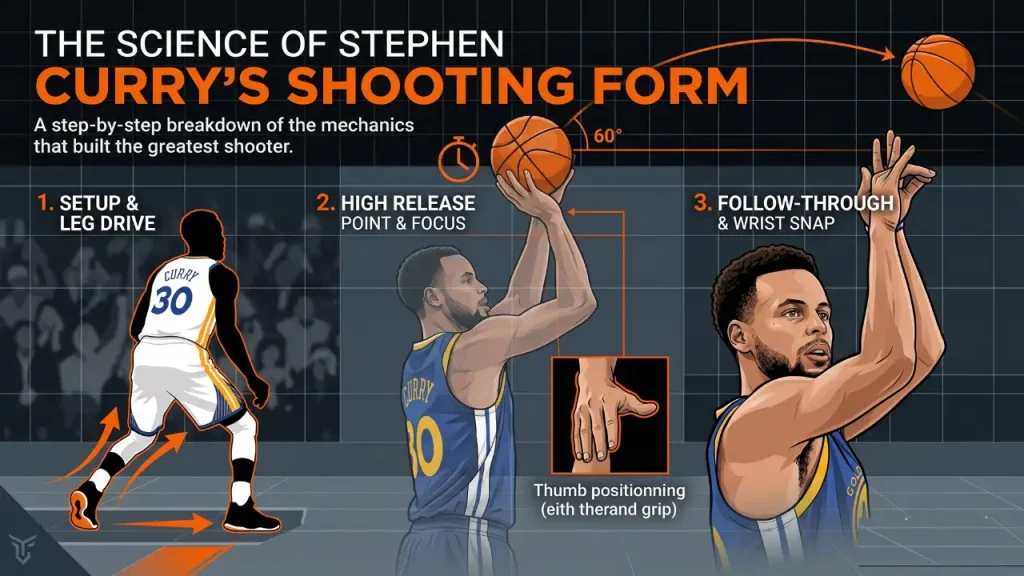
Step 1: The Stance
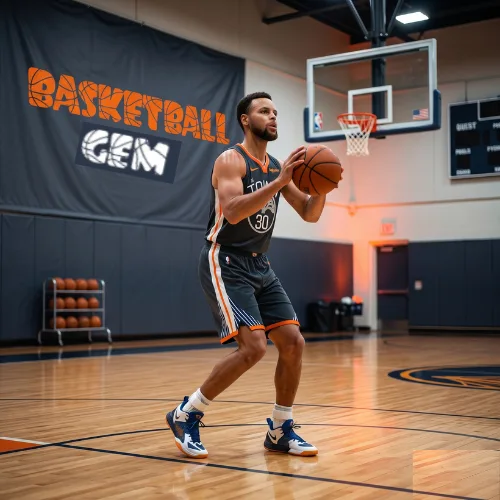
Curry uses a predominantly wide stance, with his feet set wider than shoulder-width apart. His knees are bent and loaded, ready to generate the upward force he needs the moment the ball reaches him.
Most coaches teach a narrower stance for guards because it allows a slightly faster initial movement. Curry compensates for his wide base by pointing his knees inward once he moves into the dip phase of his shot. This inward knee orientation is one of the elements that is unique to his body mechanics and not something every player should copy directly.
What every player should copy is the pre-load concept. Before catching the ball, Curry is already in a half-squat with his hands at waist height in what he calls his “shooting pocket.” His arms and legs are ready before the pass arrives. This eliminates wasted movement and is a primary reason his shot is so hard to contest.
Key takeaway: Get your legs loaded and hands ready before the ball comes to you. Do not stand upright and then adjust.
Step 2: The Turn
One of the most commonly taught but frequently wrong pieces of shooting advice is to stand perfectly square to the basket with both feet pointing directly at the rim. Curry, like most elite shooters, does not do this.
Instead, he uses what coaches call “the turn.” As a right-handed shooter, he angles his feet slightly to the left of the basket, with his right foot positioned just ahead of the left. Think of a clock: his right foot points toward roughly 11 o’clock and his left toward 1 o’clock, from the shooter’s perspective looking at the rim.
This angled position allows the shooting side of his body to align naturally with the basket. When your feet point directly at the rim and you raise your shooting arm, tension is created across the shoulder and hip. The turn eliminates that tension and lets the shooting arm travel straight through without fighting the body’s rotation.
When Curry receives the ball off a dribble or while running around a screen, he sometimes catches with his feet square to the rim. In those situations, he rotates his hips in the air during the jump to complete the turn and maintain alignment. It is a highly advanced technique built on thousands of hours of muscle memory.
Key takeaway: Turn your shooting-side foot slightly ahead and angle both feet to the non-shooting side. Tension is the enemy of accuracy.
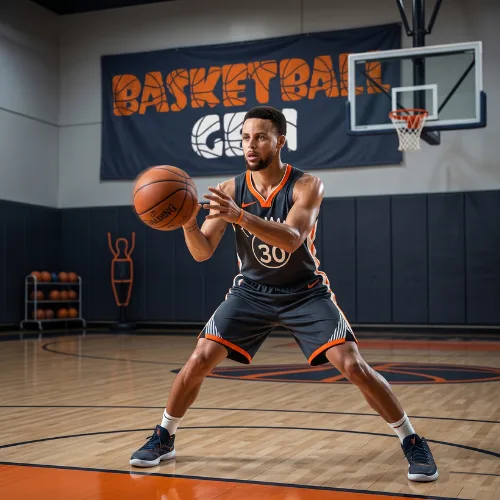
Step 3: The Catch and Shooting Pocket
The moment Curry receives a pass, the ball goes directly into his shooting pocket at waist level. He places his shooting hand on the side of the ball with his index finger and thumb forming a natural V-shape. His fingers are spread comfortably and his grip is relaxed, not tight.
His off-hand sits on the opposite side of the ball to stabilize it. The elbow of his shooting arm tucks close to his torso, which creates alignment with the basket before the upward motion even begins.
Wherever possible, Curry prefers to get the ball into the pocket using his guide hand, so that his shooting hand goes directly into the correct position without any extra adjustment. That small detail, arriving with the right hand already placed, shaves milliseconds off his release time and removes a potential source of misalignment.
Key takeaway: Catch the ball directly into your shooting pocket. Your shooting hand should not need to “search” for position after the catch.
Step 4: Aiming at the Rim
Many coaches teach players to aim at the center of the basket. Curry simplifies the target. He focuses on the front of the rim, specifically the point where the rim meets the net on the side closest to him.
This smaller, specific target is easier to lock onto consistently than aiming at a general area. It also naturally produces the right arc and depth on the shot because a ball aimed at the front of the rim with proper backspin will either go in cleanly or catch the front iron and roll forward into the basket.
Curry takes his aim while he is receiving the ball, not after. By the time he is ready to shoot, his eyes are already locked on the target. This overlap between catching and aiming is a major efficiency gain and part of why he can release so quickly.
Key takeaway: Aim at the front of the rim, where the net meets the iron. Lock onto the target during the catch, not after.
The Shooting Motion Phase
This phase is where Curry separates himself most clearly from average shooters. His shooting motion is extraordinarily efficient, generating maximum power with minimum wasted movement.
Step 5: The Dip
After the catch, Curry brings the ball slightly downward before beginning the upward motion. This is called the dip, and it serves two purposes.
First, it generates momentum. The downward movement of the ball, combined with a slight additional bend in the knees, loads energy that feeds directly into the upward push. Think of it like compressing a spring before releasing it.
Second, it creates rhythm. Curry’s shot has a flowing, one-piece rhythm that makes it incredibly consistent. The dip is the beginning of that rhythm. When the dip is rushed or skipped, the rest of the motion becomes choppy and disconnected.
When Curry shoots off the dribble, the final dribble itself acts as the dip. The ball bounces up into his catching hand at roughly waist height, which means it is already in the starting position for the upward motion. No additional dip is needed in those cases.
Key takeaway: Dip the ball slightly after the catch to load energy and establish rhythm. Keep the dip short and fluid, never exaggerated.
Step 6: The Upward Motion
Curry is what coaches call a “midline shooter,” meaning he brings the ball up along the center of his body from the shooting pocket toward the set point. His shooting hand begins on the side of the ball during the catch but rotates behind the ball as it travels upward.
Viewed from the side, the path of the ball during this phase traces a subtle S-curve. It starts close to his body at the bottom of the dip, moves slightly away as his shooting hand rotates behind the ball, and then returns close again as he reaches the set point.
Critically, his legs begin their upward push at the exact same moment the ball starts its upward travel. The legs and the arms move together as a single connected system. If the legs push first and the arms follow, or vice versa, timing breaks down and the shot loses power and consistency.
According to research on basketball shooting biomechanics published by the National Strength and Conditioning Association, coordinated lower body engagement is one of the key differences between elite shooters and average ones.
Key takeaway: Your legs and arms should begin their upward movement simultaneously. The power comes from the legs. The arms guide the ball.
Step 7: The Set Point
The set point is the position where the ball momentarily transitions from moving toward the shooter’s head to moving toward the basket. It is the peak of the backswing before the release.
Curry’s set point is lower than what most coaches teach. Traditional coaching places the set point at eyebrow level so the shooter has a clear line of sight to the rim. Curry’s set point sits just above his right eye, partially blocking his vision of the basket.
This works for him because, as covered in Step 4, he already locked onto the target during the catch. His aim is set before the ball ever reaches the set point. He does not need to look around the ball because he already knows where the rim is.
At his set point, his wrist is fully cocked, his forearm is nearly vertical, and his elbow forms roughly a 90-degree angle with his upper arm. His upper arm, elbow and shooting hip are in near-perfect vertical alignment. The ball has not stopped moving at this point. Curry’s shot is a true one-motion action, meaning the ball transitions smoothly from upward travel to release without ever pausing.
Key takeaway: Reach your set point before your feet leave the ground. The ball should never fully stop at the set point. Keep the motion continuous.
The Release and Follow-Through Phase
This final phase is what most people focus on when watching Curry shoot. His release looks almost impossibly fast, but it is the result of everything that came before it being perfectly executed.
Step 8: The Release
Curry’s jump is deliberately low. He does not need significant height because his release is so fast that defenders rarely have time to alter the shot regardless of how high he jumps. A lower jump also has a significant consistency advantage. Since less muscular effort is required to reach jump height, his body can replicate the exact same motion late in a game when fatigue sets in, just as effectively as in the first quarter.
His wrist snaps and his elbow fully extends at the exact same moment. This synchronized snap is one of the most important and most difficult mechanics to master in shooting. When the wrist snaps before or after the elbow extends, the ball releases at an uncontrolled angle. Curry has drilled this synchronization to the point where it is completely automatic.
During the release, Curry transfers the weight of the ball from his palm toward his fingertips. He uses what is called a “four fingers down” release, meaning at the completion of the snap, all four fingers of his shooting hand point downward toward the floor. Unusually, the ball leaves his hand last from his middle finger rather than his index finger. Most elite shooters end with their index finger as the last point of contact, but Curry’s middle-finger exit creates the backspin pattern he prefers.
Curry’s release time has been measured at approximately 0.4 seconds from catch to release, among the fastest in the NBA. For reference, the average NBA player’s release takes closer to 0.54 seconds. That 0.14-second difference is why defenders so often find themselves contesting an already-released shot.
Key takeaway: Synchronize your wrist snap and elbow extension. They should happen at the same time, not sequentially.
Step 9: The Follow-Through
After the release, Curry holds his follow-through position with his arm extended fully upward. His elbow finishes in line with his forehead, not dropped out to the side. This high elbow follow-through is what gives the ball its arc despite the relatively low set point.
His wrist remains slightly flexed after the snap, not locked stiff. A relaxed wrist at the end of the follow-through indicates the snap was fluid and complete. A rigid, tense wrist suggests the shooter muscled the ball rather than letting the wrist do its job.
Curry maintains the same follow-through position on every shot, regardless of distance or difficulty. Consistency in the follow-through is a direct feedback mechanism for the rest of the shot. If something went wrong earlier in the motion, it usually shows up as an inconsistent follow-through. Think of it as the quality-control check at the end of the production line.
Key takeaway: Hold your follow-through until the ball hits the rim or goes through the net. Your elbow should finish above your forehead, not drifting to the side.
Step 10: Eyes and Awareness
Curry keeps his eyes locked on the front of the rim from the moment he aims during the catch, all the way through the release. His gaze does not drift to the ball, the defender, or anywhere else during the shot.
The moment the ball leaves his fingertips, his eyes begin tracking the flight of the ball. His head tilts back slightly as he follows the arc. This is not a nervous or distracted reaction. It is deliberate and purposeful.
Elite shooters use ball-flight information to diagnose their mechanics in real time. By watching how the ball travels, a shooter can tell whether their arc was too flat, whether their release was slightly off to one side, or whether their follow-through was inconsistent. Curry processes this information immediately and uses it to self-correct on the very next shot. It is one of the reasons he can have an off game in the first quarter and heat up by the third.
Key takeaway: Keep your eyes on the rim target through the release. After the ball leaves your hand, track its flight to evaluate your mechanics.
What Makes Curry’s Form Unorthodox?
Despite his status as the consensus greatest shooter in history, several elements of Curry’s form contradict standard coaching orthodoxy. His wide stance with inward-pointing knees is unusual. Most coaches teach a narrower, more neutral base because it is more efficient for the majority of body types.
His set point is lower than the textbook recommendation. Coaches typically want the ball at eyebrow level for clear sight lines. Curry covers his shooting eye. His ball exits from his middle finger rather than his index finger, which is the opposite of what most shooting instructors teach.
Yet none of this matters because he has built tens of thousands of repetitions around these mechanics until they are completely automatic. As sports science researchers at Basketball-Reference document, Curry has made over 3,700 three-pointers in his career at a 43% clip, the most prolific three-point shooting career in NBA history. The form works.
The lesson is not to copy his unorthodox elements. The lesson is that with enough deliberate practice, a shooter can make almost any mechanically sound system work. Curry’s core fundamentals, aligned body, connected motion, consistent set point, synchronized release, are all textbook. The details he has adapted are ones that serve his specific body.
Curry vs Ray Allen vs Klay Thompson: Form Comparison
To understand what is truly special about Curry’s mechanics, it helps to compare him with the other elite shooters who sit alongside him in the conversation for greatest of all time.
Stephen Curry is a one-motion shooter with a lightning-fast release and a low set point. His shot is built for volume and speed. He can get it off against any coverage from any distance, and his rhythm-based approach means he can heat up in streaks unlike almost any player in history.
Ray Allen, widely considered the most technically perfect shooter the game has ever produced according to many NBA coaches, used a more traditional two-motion approach. He jumped first, reached a higher set point at full extension, and then released. His form was a textbook model of every coaching principle. Allen’s shot was built for precision and repeatability. It was slightly slower than Curry’s but extraordinarily consistent under pressure. You can explore Allen’s career statistics at Basketball-Reference.
Klay Thompson, Curry’s teammate and fellow Splash Brother, uses a set point closer to the textbook eyebrow-level recommendation. His feet are generally narrower than Curry’s and his jump is slightly higher. Thompson is a catch-and-shoot specialist who thrives on stationary shots off movement screens, while Curry is more effective creating his own shot off the dribble. Thompson’s form is considered by many coaches to be the more immediately teachable of the two for young players.
The three represent different philosophies: Curry optimizes for speed and range, Allen optimized for technical perfection, and Thompson sits in between as perhaps the most replicable model for developing players.
Should You Copy Stephen Curry’s Shooting Form?
The honest answer is: partially yes, and partially no.
The elements you absolutely should adopt include his pre-load stance, his use of the turn for body alignment, his catch-into-pocket efficiency, his coordinated legs-and-arms motion, his synchronized wrist-and-elbow release, and his consistent follow-through position. These are universal principles that improve any shooter’s mechanics regardless of body type.
The elements you should approach with caution include his specific wide-stance-with-inward-knees setup, his low set point, and his middle-finger exit point. These work for Curry because he has built his entire muscle memory around them. If you already have a different set point or release pattern that is consistent and accurate, disrupting it to copy Curry’s specifics may do more harm than good.
The NBA’s official player development resources consistently emphasize that individual shooters should build around principles, not copy specific player mechanics. The principle Curry embodies better than anyone is this: eliminate wasted movement, create rhythm, and put in enough repetitions that the mechanics disappear into muscle memory.
If you are a young player building your shot from scratch, Curry’s form is an excellent blueprint to start from. If you are an experienced player refining an existing shot, take the principles and leave the idiosyncrasies.
3 Drills to Develop Curry’s Quick Release
Drill 1: The Form Shooting Progression
Start 3 feet from the basket and shoot with one hand only, using your shooting hand. Focus entirely on your set point position, wrist snap, and follow-through. Once you can make 10 in a row consistently, take one step back. Repeat until you reach the free-throw line.
This drill builds the foundational muscle memory for the release phase without the complexity of the full motion. Curry reportedly still uses one-hand form shooting as part of his warm-up routine.
Drill 2: The Catch and Shoot (No-Gather) Drill
Have a partner or rebounder pass you the ball. Your only job is to catch the ball directly into your shooting pocket and release it immediately, with no extra dribbles or gathering steps. Time from catch to release should be under half a second.
This drill forces you to build the pre-load habit described in Step 1 and the catch-into-pocket efficiency from Step 3. Start at the free-throw line and work outward to the three-point line as your timing improves.
Drill 3: The Rhythm Shooting Circuit
Place 5 cones at different spots around the three-point arc. Move from cone to cone, receiving a pass at each and shooting immediately. The key is to maintain the same dip-and-rhythm motion at every spot, regardless of where you are on the floor. This is the drill that most directly replicates the game-speed rhythm Curry uses in real situations.
According to research on motor learning from the American College of Sports Medicine, variable practice across multiple locations is more effective for building transferable shooting habits than blocked repetition from one spot.
Conclusion
Stephen Curry’s shooting form is a masterclass in efficiency, rhythm, and deliberate practice. Every element, from his pre-loaded stance to his synchronized wrist-and-elbow release, serves a specific mechanical purpose. Nothing in his shot is random.
The 10 steps we have broken down here give you a detailed blueprint of exactly what Curry does and why it works. The elements you should prioritize replicating are the pre-load habit, the turn, the catch-into-pocket efficiency, the coordinated legs-and-arms motion, and the synchronized release. Add a consistent follow-through and the habit of tracking ball flight to self-correct, and you have the foundation of an elite shooting system.
Pair that foundation with the three drills above, put in the repetitions, and remember that Curry’s form looks effortless today because of years of deliberate, high-volume practice. The mechanics can be learned. The only variable is the work.
Frequently Asked Questions
What makes Stephen Curry’s shooting form so special?
The combination of speed and consistency is what separates Curry from every other shooter. His release time of approximately 0.4 seconds gives defenders almost no time to contest. His one-motion mechanics eliminate the pause that exists in most players’ shots. And his rhythmic, pre-loaded approach means he can replicate his form under fatigue late in games.
Is Stephen Curry a palm shooter?
Yes. Curry rests the ball on his full palm before transferring weight to his fingertips during the release. This is one of his unconventional mechanics, as most coaching manuals teach shooters to keep the ball off the palm and on the pads of the fingers throughout. Curry’s palm start does not hurt him because his hand rotation during the upward motion naturally shifts the ball to his fingertips by the time he reaches his set point.
How high is Stephen Curry’s release point?
Curry’s set point sits just above his right eye, which is lower than the eyebrow-level standard most coaches teach. However, his follow-through finishes with his elbow above his forehead, which gives the ball the arc it needs to clear defenders and drop into the basket.
Why is Stephen Curry’s shooting form considered unorthodox?
Three elements deviate from textbook form: his wide stance with inward-pointing knees, his below-standard set point, and his middle-finger ball exit on the release. Despite these deviations, all of his fundamental principles, body alignment, connected motion, synchronized release, and consistent follow-through, are mechanically sound.
How fast is Steph Curry’s release?
Curry’s release time has been measured at approximately 0.4 seconds from catch to release. The average NBA player releases in roughly 0.54 seconds. That difference of 0.14 seconds is the primary reason his shot is so difficult to block even when defenders are in position.
Can a beginner copy Stephen Curry’s shooting form?
A beginner should study and apply Curry’s fundamental principles: the pre-load stance, the turn, the coordinated leg-and-arm motion, and the synchronized release. His unconventional specifics, the wide stance, the low set point, the middle-finger exit, are products of his unique body mechanics and years of ingrained muscle memory. A beginner starting fresh is better served by the standard fundamentals and adapting from there.
What drills does Stephen Curry use?
Curry is known for extensive one-hand form shooting close to the basket, catch-and-shoot repetitions at game speed, and high-volume three-point shooting circuits. He has described his pre-game routine as involving hundreds of repetitions designed to build and reinforce rhythm rather than just volume.